2026-10-11 · 29 min · agents · agentic-coding · generative-ui · developer-tools
Why read this
Essentialtop 10%Reads Anatomy's skill and kit line by line, then follows it to draw the skill itself as a live isometric bench, with every fix the port needed.
- Analysis found nowhere else
- Open and runnable
- Interactive explanations
Developer tools & infraAPI onlyMITPractitioner tool
How this was scored
- Is it new?
- 2 of 3: A real new idea, method or capability
- Can I trust it?
- 2 of 3: Measures key facts from files, code or configs
- Can I run it?
- 3 of 3: Open, permissive, runs on reader hardware with instructions
- Will I understand it?
- 3 of 3: Mechanism carried by interactives built from real code or data
- Can I act on it?
- 2 of 3: A concrete recipe, numbers or comparison
- Will it last?
- 2 of 3: A reference for a year or more
- Does it affect many?
- 2 of 3: A widely used model, tool or lab release
- Only here?
- 3 of 3: The only place this analysis exists
Score 82 of 100, ranked 11 of 494 rated articles. Each question is answered 0–3 by hand, and a 3 is rare. How articles are scored
The launch post for Anatomy went round on 10 October with one line of pitch: "Describe a machine in one line. Claude brings it to life." Under it were three claims: "interactive isometric wireframes you can rotate, inspect and explore", "WebGL shaders for fire, water, plasma and more", and "real 3D motion, with individual parts that rotate and move". By the next day the post had 9,261 likes and 804,262 views, and the repository had 2,801 stars two and a half days after it was created.
I write about agent skills on this site often enough that I have a prior: most of them are a long prompt with a few examples. So I expected a SKILL.md that tells Claude to write three.js, and some screenshots. That is not what is in the repository. There is no three.js anywhere. There is a 168-line SKILL.md, eight reference notes of 2,202 lines, and a drawing kit of 15 files and 16,235 lines that has no dependencies at all. And the word "wireframe" appears in the skill exactly once, in a list of things reviewers rejected.
The site owner asked for something specific with this one: use Anatomy to explain Anatomy. So the centre of this page is a figure I built by following the skill as if it had been invoked, with the request "explain how the Anatomy skill turns one line into a figure". It is below, after enough of the mechanism to make it make sense. Everything I had to change to get it onto this site is in the section after it, because that is the most direct evidence I have of how good the skill is.
- license
- MIT
- branch
- main
- tests
- none found
- source
- 11.6 MB
- commit date
- 2026-10-10
by size of tracked source at this commit, file counts in brackets; docs, data and vendored trees excluded
Read at dbf697a (10 October 2026), a depth-1 clone. Created 8 October 2026, 8 commits. MIT. SKILL.md 168 lines; kit/ 15 files, 16,235 lines; references/ 8 files, 2,202 lines; 8 examples; 5 evals.
local clone, 2026-10-11 at dbf697a — branch, commit, commitDate, fileCount, hasTests, languages, license, licenseFile, shallow
shallow clone: counts describe the pinned tree, not the history
What the video shows, and what the repository says
The launch video is 38.9 seconds. It types /anatomy explain how a big airliner turbofan engine like the A380's makes thrust, interactive and then plays back a build: a counter climbs to 220 parts and 1,725 lines while the engine assembles piece by piece, then the throttle opens and a shader lights the intake, combustor and exhaust.
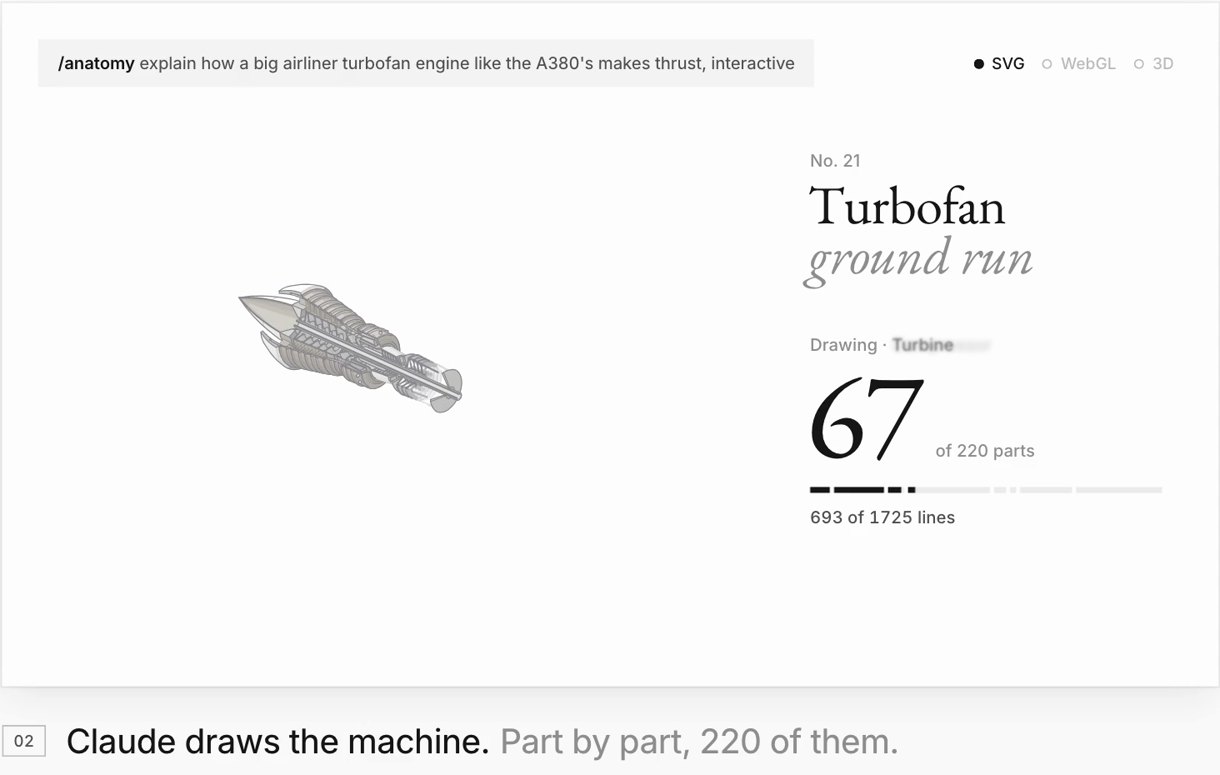
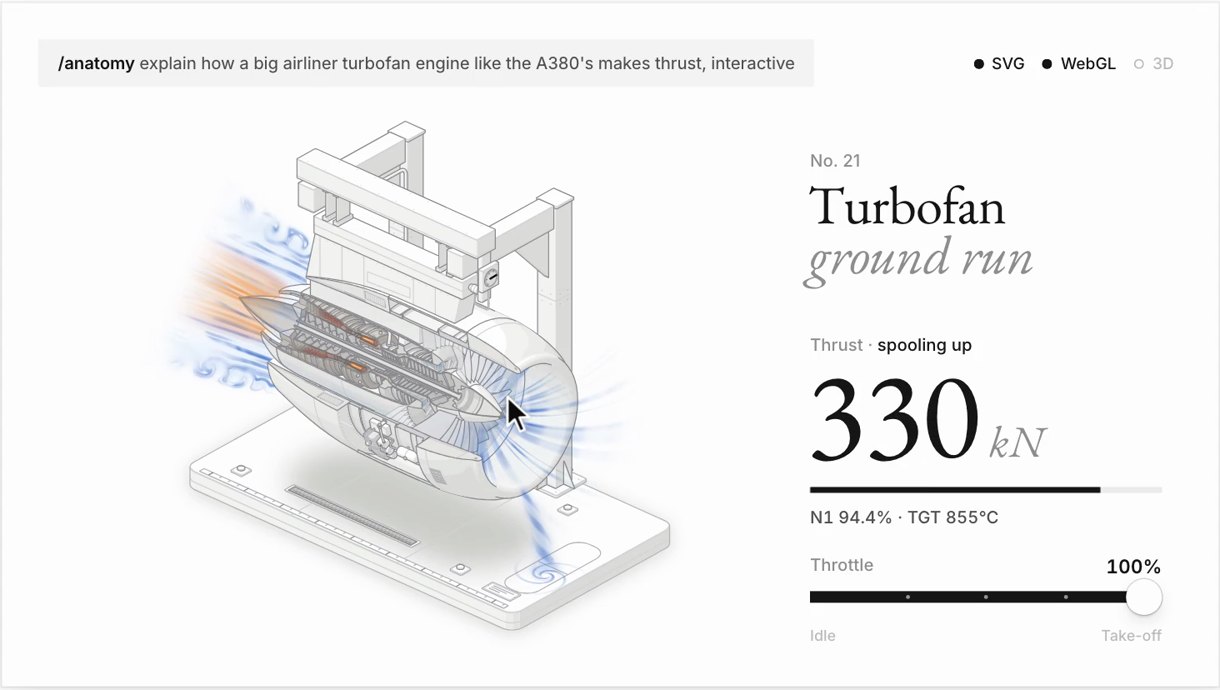
The edit is honest about one thing that matters: the counter says what the thing costs. 220 parts is a big figure. What it does not say is how long the build took, and the project site does: the turbofan was 14 hours of Claude's active time, first build in 4 hours 41 minutes, then five review and fix rounds. A one-line prompt is the input. It is not the effort.
The "wireframes you can rotate" line is the part I would correct. The skill's craft rules open with "Solids, not wireframes" (SKILL.md:106), and its anti-pattern list names wireframes as "see-through boxes where the back edges show". Nothing in an ordinary Anatomy figure rotates. The drawing is a fixed isometric camera, and rotation is the optional 3D mode, marked beta, which one of the collection's 33 machines uses. "Inspect" is accurate: you hover, drag and press keys, and the readout answers.
The rule at the top of the file
SKILL.md has one section above the workflow, and it is the whole idea:
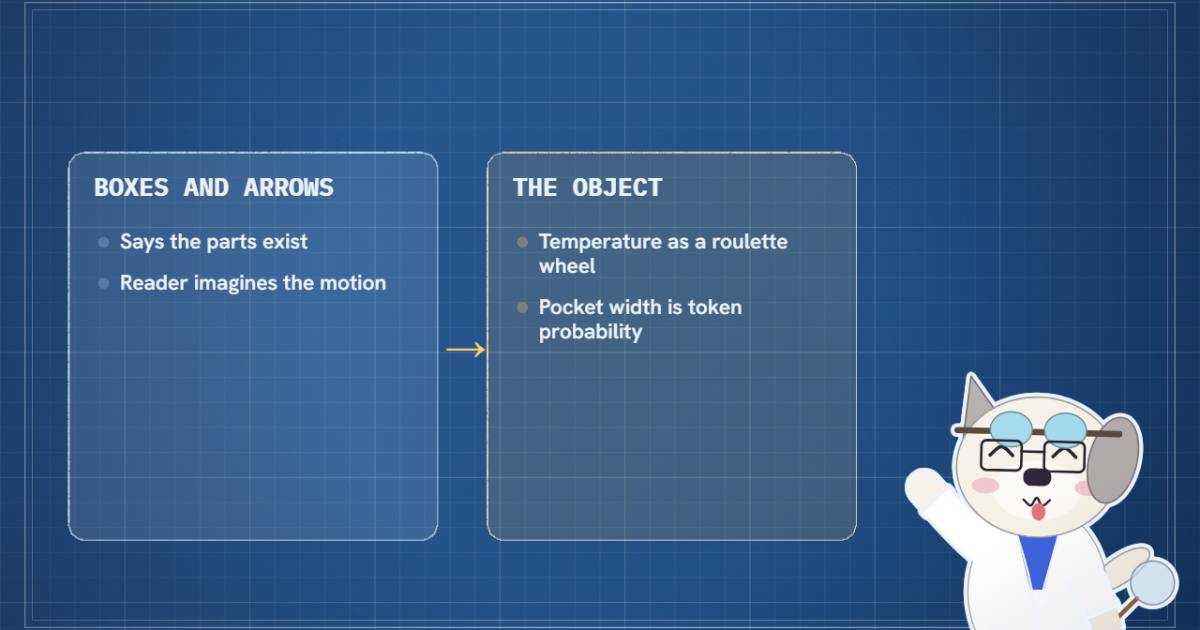
The object is the explanation. Don't draw boxes, arrows and labels. Invent a real, well-made physical thing whose working is the concept.
It then gives the mappings that earlier figures used: a cache key that skips work becomes a pin-tumbler lock that only turns when every pin matches, one shared GPU context becomes a gantry plotter visiting 16 wells, a separable blur becomes a bed-of-nails stamp beside two combs. And it names the two ways a figure fails, both "seen in practice": too abstract (stacked plates and labelled boxes) and too flat (one slab with a few lines).
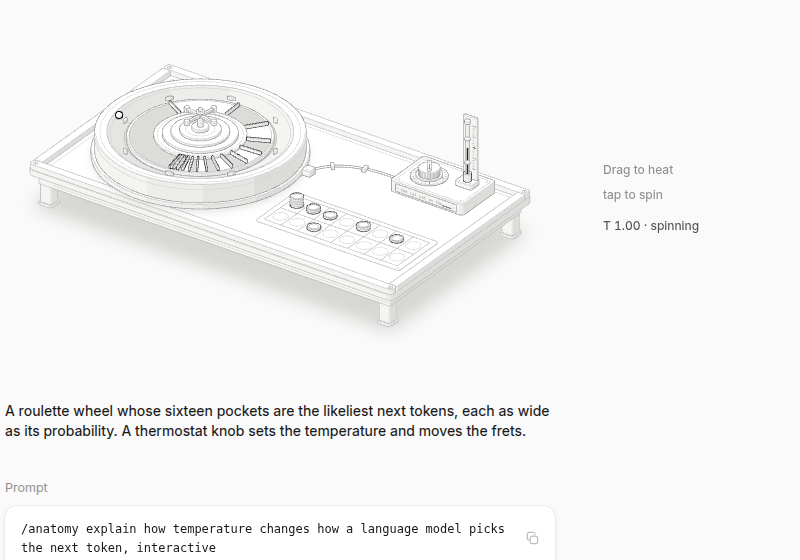
I think this is the cleverest thing in the repository, and it is cheap. It is a constraint on the model's choice of subject, not on its drawing. A model asked to "explain connection pooling" will reach for boxes and arrows because that is what most of its training data looks like. Forbid that, and it has to pick an object, and an object comes with a parts list, a scale and a way of moving that the reader already knows. The collection shows it working on ideas that have nothing to do with machines. Temperature in sampling is a roulette wheel whose sixteen pockets are the likeliest next tokens, each as wide as its probability, with a thermostat that moves the frets:
How a sentence becomes valid geometry
The interesting question for an engineer is not how Claude chooses a roulette wheel. It is how a model that cannot see its output produces 500 shaded parts that stand on each other without passing through each other. The answer is that the skill never lets the model write raw 3D. It hands it a kit, and the kit has a very small vocabulary.
Every point goes through one function. kit/iso-kit.ts:54:
export function iso([x, y, z]: Point3, projection: Projection): Flat {
  const { origin } = projection;
  const { sinA, cosA, sinE, cosE, k } = cameraOf(projection);
  return [origin[0] + (x * sinA - y * cosA) * k, origin[1] + ((x * cosA + y * sinA) * sinE - z * cosE) * k];
}
That is an orthographic camera with two angles: azimuth A round the vertical axis, 45° by default, and elevation E, 30° by default. Strictly, 30° is dimetric rather than isometric (true isometric looks down at about 35.26°), which the author's own write-up points out. Because the camera is orthographic, every pixel is a straight ray along the same direction, parallel edges stay parallel, and a part keeps its size wherever it stands. depthOf (kit/iso-kit.ts:65) is the same camera read the other way, how far a point lies toward the viewer, and it is the sort key for everything.
Solids are prisms. A part starts as a plan on the floor, a rounded rectangle or a circle, and extrude (kit/iso-kit.ts:156) lifts it to a height. It returns a paper-coloured fill that hides what is behind, the visible side faces bucketed into four tones, a lighter top, the crease where the top meets the sides, and the outline. The shading is one line of arithmetic per face, kit/iso-kit.ts:198-206:
const [lx, ly] = [-sinA, cosA];
for (let index = 0; index < count; index++) {
  if (!facing[index]) continue;
  const [nx, ny] = normals[index]!;
  const lit = (nx * lx + ny * ly + 1) / 2;
  const shade = Math.min(SHADES - 1, Math.max(0, Math.floor(lit * SHADES)));
  ...
The light is locked to the camera, from the viewer's left. That sounds like a shortcut and it is a design decision: every figure is lit the same way at any azimuth, and, as the 3D mode later exploits, turning a part by θ is exactly the same picture as moving the camera by −θ.
Round parts that are not vertical (a bell, a flange, a pipe on any axis) come from kit/lathe.mjs, which turns a half-section profile round any axis, and pipes and cables from kit/tube.mjs, which cuts a route into depth-sortable chunks. The model's job is reduced to choosing numbers: plans, heights, radii, profiles and routes. Once the numbers are in that form, a model can't produce a non-manifold mesh or a face with its normal flipped, because it never writes a face.
What it can still get wrong is order. SVG has no depth buffer, so a figure is painted far to near. That works until two parts overlap both ways, like a coil spring round a rod, and the skill's rule is to split the wrapping part into a back half and a front half and paint the rod between them. Past a few dozen overlaps, hand-set order fights itself, so every helper records the true shape it drew and kit/audit.mjs (settle, line 1807) ray-casts every pair that overlaps on screen to find which surface is nearer, then raises each part's sort key just enough to satisfy every pair. A pair that can't be satisfied interlocks, and the instruction is to fix the geometry, "never with a key bias".
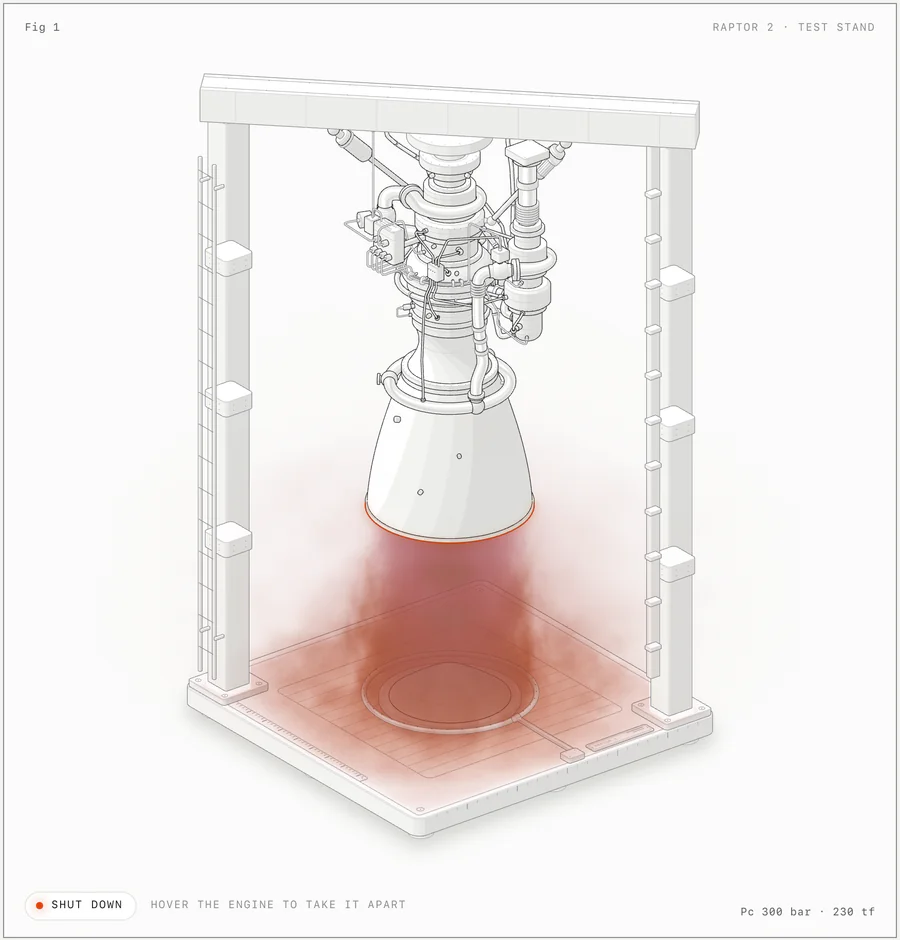
The audit's history is in the references, and it is the best argument for it. The first Raptor engine looked fine at normal size; zoomed in, it had cables running through the main ducts. Its first audit found 54 clearance problems and 323 depth-order problems, and the hand-set keys had left 190 pairs drawn the wrong way round assembled and 133 apart. Measured keys took both to zero. The turbofan's audit checks 541 solids and 6,320 overlapping pairs in 62.4 seconds.
The audit sees geometry and never markup. The second check sees markup and never depth: scripts/lines.mjs opens the page in headless Chrome and walks both ends of every texture line, and each must land on a stroke, a dot or an outline within one pixel. A tick floating on a bare plate, a seam stopping three units short of a corner: those are real faults the references say a reviewer found at 4× zoom, and the check turns them into a number. Everything in the skill's last workflow step ends in something a model can read: a PNG, a line count, an exit code.
Fig 1: the skill, as a machine
Hover a station or tap it, or focus the card and use the arrow keys; on its own it plays a tour, carrying the prompt card along the rail from the hopper to the loupe.
It is a bench on four feet with nine stations behind a rail, one per stage of the skill's workflow, in the order SKILL.md lists them. A carriage carries a card, the one-line prompt, past each of them.
- Station 01, intake, is a hopper with a slot. It stands for the frontmatter
description(SKILL.md:2-3). Until a request matches it, Claude sees only the skill's name and that paragraph, which lists isometric illustrations, explanatory diagrams and interactive explainers and adds "even if they never say" the word isometric. The paragraph is the router. - Station 02, size it, is three gauge blocks of different heights for Figure, Hero and Epic (SKILL.md:54-58). A Figure is 40-80 parts and about 30-90 minutes; a Hero 80-150 parts and 2-4 hours; an Epic six hours or more and is never started without asking. The rider checks the tallest block first and settles on the size of the request.
- Station 03, truth first, is a dial gauge. The numbers go into a small pure model before any drawing (SKILL.md:59), and the needle here rides the kit's own spring, sub-stepped at 240 Hz (
kit/react/live.tsx:101). - Station 04, parts list, is a tray of 40 pegs, the minimum the skill asks for (SKILL.md:61).
- Station 05, build once, is an extrusion press: a plan on the die is lifted into a prism with four side tones and a lighter top. That is
extrudeandslabOf(kit/iso-kit.ts:156and:236). - Station 06, paint back to front, is a rack that deals five cards far to near, the order SVG paints in (
depthOf, andsettlein the audit). - Station 07, shader layer, is a glass chamber whose plasma is real WebGL, drawn between the back SVG and a front SVG that holds the near glass and the carriage (
kit/gl.mjs:64,glLayer). - Station 08, one camera, one card, is a copy stand: one lens straight over a framed card with its four corner marks, the projection and the
Plate. - Station 09, verify like a critic, is a loupe over a test card (SKILL.md:67-73,
scripts/lines.mjs).
The legend under the card names the real file and line for each station, and the readout in the corner is the live value from the same state that moves the parts: the needle's spring value, the block's height, the number of cards dealt, the plasma's envelope.
What I followed, step by step
Step 1 says to size the request before anything else. I called it a Figure: one mechanism, one WebGL layer. By the parts rule it came out bigger than that. The bench has 111 solids, which is Hero territory (80-150), mostly because the skill's density rule pushes you there: the tray alone is 40 pegs, and every station got a plinth with four screws, because the skill says a bare face is "unfinished work, not calm".
Step 2, truth first, was the easy part here, because the subject is a set of files. Each station's caption names the file and line it stands for, and I checked every one against the clone.
Step 3, invent the object, took longest. My first idea was the one the site owner suggested, a hopper feeding a gearbox feeding an assembly, and it failed the skill's own test: "say in one sentence what moves and what that motion means." A gearbox for "the instructions" doesn't move in a way that means anything. A bench of stations does, because the skill is a fixed sequence, and the thing that moves along it, the prompt, is what the sequence is applied to. The gauge blocks, the press and the card rack each move the way their stage works: a size is measured, a plan is extruded, cards are dealt far to near.
Steps 4 to 7 I followed literally, with the kit. The plans are rounded rectangles and circles in world units of about a pixel. The camera is azimuth 58°, elevation 30°, because the skill says to turn the azimuth so the long side faces you, and its test rig uses 57° for the same reason. fitProjection fits the plate and the tallest points into a 640 by 300 viewBox. Every static path is built once at module load; only the dial needle and the extruded block change shape, so only they are rebuilt per frame. Parts are painted base first, then stations far to near, then the rail, with the press split into back columns, block, front columns, ram and crosshead so the block sits inside the frame, exactly the "split wrapping parts" pattern.
Step 8 is the card: figure number top left, title top right, hint bottom left, live readout bottom right, the legend under it, and no words in the drawing. Step 9 is the motion rules from references/motion.md: time from requestAnimationFrame clamped to a thirtieth of a second, exponential follow for the carriage, the kit's spring for the needle and the press, an idle tour that starts 1.4 seconds after the card scrolls into view, pauses on hover or focus and resumes 3.6 seconds after the last input, a loop that stops when nothing moves or the card is off screen, and stillness under reduced motion: no tour, springs jump to their targets, and the plasma draws one still frame.
One lit accent: selecting a station turns its outlines to the theme's strongest ink and lifts its tops, and every other station steps down a tone. That is the selection rule from the Raptor's exploded view, done with CSS custom properties instead of the kit's attribute rules.
What I had to change
None of the changes were about the drawing. They were all about putting a figure into someone else's React app, which is where a skill's output meets reality.
There were no dependencies to remove. The brief for this article allowed three.js only if the site already had it, and it doesn't. That turned out not to matter: the kit is plain TypeScript that returns SVG path strings, and the shader layer is raw WebGL 1. The README's dependency badge says 0 and means it. I ported the parts of kit/iso-kit.ts the figure uses (the camera, extrude, the line helpers) into the component folder with the MIT notice, and a trimmed GLSL_ISO from kit/gl.mjs.
The first real change was deterministic math. references/react.md says to render the rest pose on the server and again on the client's first render, which is right. But the kit computes every coordinate with Math.sin, Math.cos and Math.hypot, which the ECMAScript spec only requires to be approximations, so Node and Chrome can differ in the last bit. After rounding to a tenth of a pixel that almost never shows, but "almost never" across 111 solids is a hydration warning waiting to happen. Every transcendental call in my port goes through this site's lib/dmath, which pins results to 12 significant digits. I rendered the figure with React's server renderer and hydrated it in headless Chromium: no recoverable errors in either theme.
The second was the kit's React hooks, which fail this site's lint. I copied kit/react/live.tsx into the project unchanged and ran the site's ESLint config on it. Two errors, both react-hooks/refs: useLoop writes latest.current = tick during render (line 62), and useEased reads shown.current during render (line 123). kit/iso-kit.ts and kit/react/draw.tsx pass cleanly. The skill's own production example, the test rig, doesn't use useLoop; it has its own loop. I wrote one loop in a single effect instead, which is what references/motion.md describes anyway.
Themes are inverted. The kit's CSS defaults to dark and switches with data-theme="light". This site defaults to light and puts a .dark class on the page. I took the kit's token values for both themes and keyed them the other way round. Light first is also the skill's own advice: "Light ships."
A corner readout can't hold a file path either. I first put the station's file and line in the readout corner. The kit's corners are absolutely positioned and never wrap, so at phone width a 40-character path ran into the hint. The readout now holds a short live value and the citation sits in the legend, which is where the skill puts captions anyway.
I also made the shader draw only where the arc is. glLayer renders over the whole canvas, and my canvas covers the whole bench while the arc covers about a fortieth of it. I added a scissor rectangle round the chamber. Every term of the glow reaches zero well inside it, so it is an optimisation, not a cut, which the skill's "no hard cut-offs" rule requires.
Then there was my own bug, which the skill's rules made visible. The loop stops when everything has settled, as the skill says it should. At station 02 the rider sweeps Epic, Hero, Figure on a timer. In the first build the rider reached the Epic block, everything was at rest for an instant, the loop stopped, and the rider sat on Epic forever. The readout said 02 · gauge Epic, which is how I caught it. A scripted sequence has to keep the loop alive for its own duration; references/motion.md makes gestures pure functions of time for exactly this reason.
And one rule I broke on purpose. The skill bans see-through edges. The plasma chamber is glass, and through it you can see the base plate's back groove. A real glass cylinder shows what is behind it, so I left it, but it is the one place the figure departs from the craft rules.
What I could not run
The skill's last step is the part it insists on most, and I did only half of it. scripts/capture.mjs, drive.mjs, lines.mjs and kit/audit.mjs are third-party code, and this site's rule for authors is that we read other people's repositories but don't execute them. So there is no audit run and no line-end count for Fig 1. Its geometry has no pipes or turned parts, which is where the audit earns its keep, but the line check would have applied. What I did instead was the manual half of the step: my own headless Chromium, the figure at rest, at each station, in both themes, at phone width, without JavaScript and under reduced motion, and a zoomed crop of the chamber. That is how I found the stalled rider and the glass.
Light inside the lines
The second claim in the post is shaders, and the reference behind it, references/webgl.md, is the most careful document in the repository. Its rule for when a shader is allowed is strict: only for "things lines can't draw: emitted light and glow, fire and exhaust, water surfaces, caustics, soft shadows from a real lamp, smoke and steam". A glowing LED is a lit dot, not a shader. If deleting the effect leaves the explanation standing, delete the effect.
A shader can't be depth-tested against SVG, so order lives in a stack: a back SVG with everything the effect can cover, the canvas, and a front SVG with everything that covers it. The canvas sees the same camera because the GLSL repeats the kit's projection: project() in GLSL_ISO is iso() term for term, and onFloor inverts it, so a glow on a floor lands on that floor's SVG lines. In an orthographic camera the screen distance from a pixel to a world point, divided by the scale, is the true distance from that pixel's ray to the point, so a glow can be sized in world units without a ray march. Fig 1's arc uses exactly that.
The light theme gets a section of its own, and it is the most transferable thing in the repository. On a white page nothing is brighter than paper, so a glow can't be added light. The shader decides what colour the paper should show and solves for the ink that would produce it, with an alpha floor so a pale-hot core still hides the lines behind it. The references list the faults seven conversions from dark to light produced: a plume that read as "red ink smoke", flames drawn as outlines, sparks that looked like dirt, a cavity that got heavier as the fire went out. Fig 1's plasma uses the same inkFor in light and screen blending in dark.
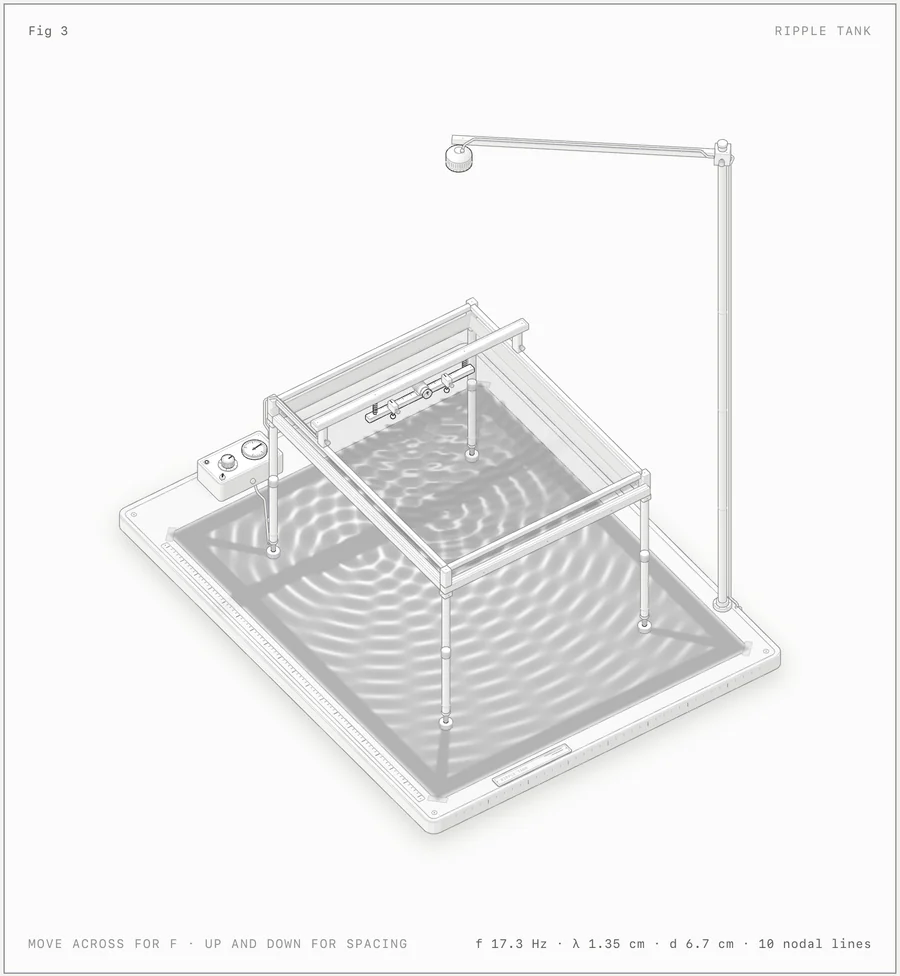
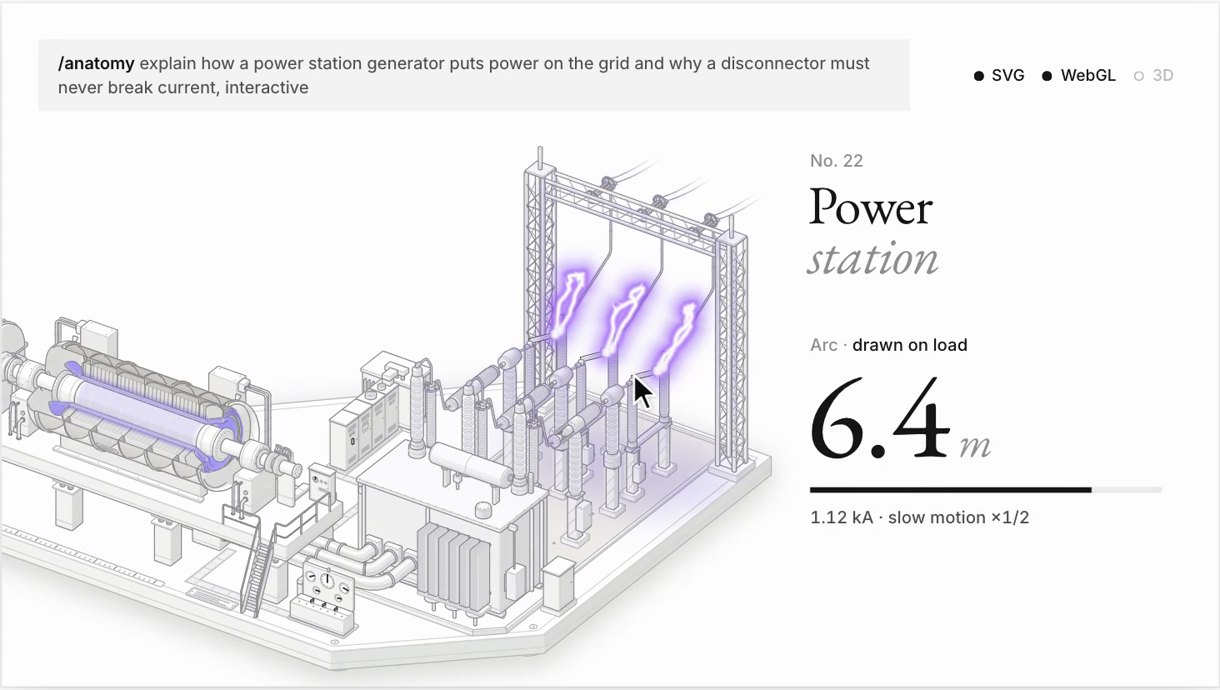
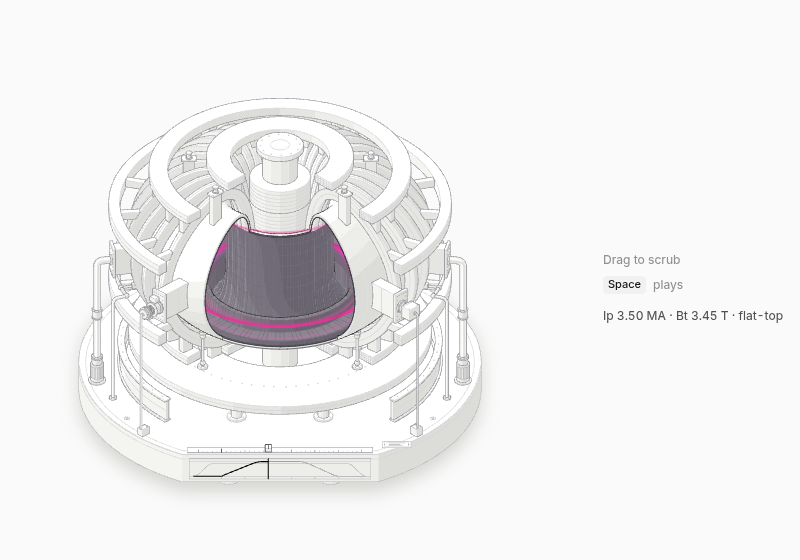
The post's "fire, water, plasma" is true of the collection, but only two of the shaders ship in the repository: the Raptor's plume and the ripple tank. The plasma ones are figures on the project site: a tokamak, a plasma cutter, a power station's disconnector arcs. Those are the figures the light-theme rules were written from, and you can look at them, but you can't read their code.
Turning, the beta
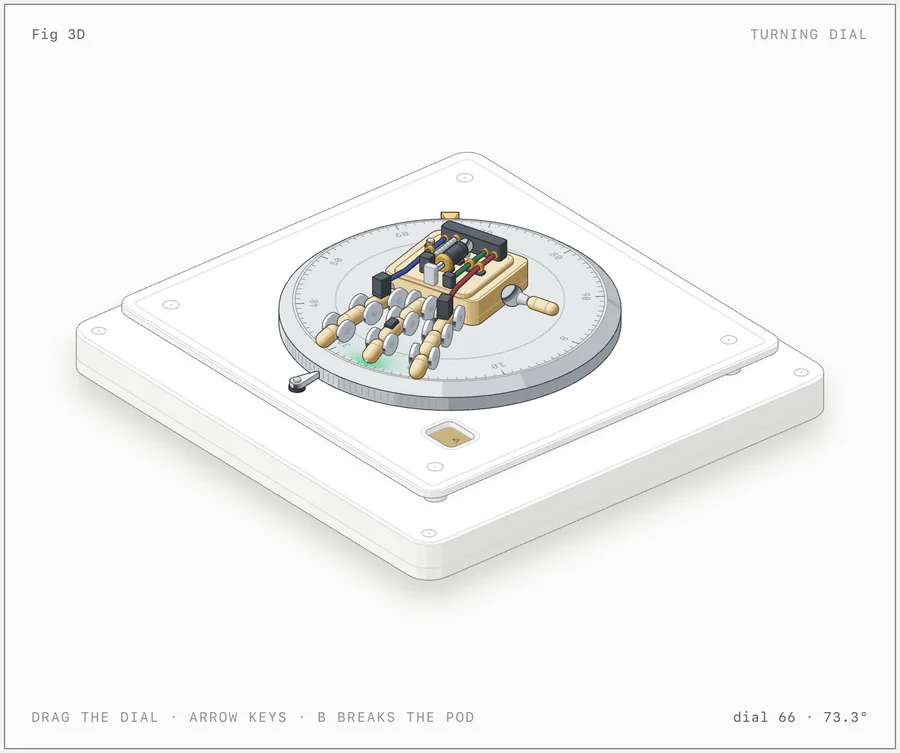
The third claim, "real 3D motion", is the 3D mode in kit/turn*.mjs, and it is the part the repository is most cautious about. references/3d.md says it is "proved on its example and one test figure, not yet on a production figure". One figure in the collection of 33 uses it.
The trick that makes it affordable is the camera-locked light. Turning a group by θ about a vertical axis gives exactly the picture the kit would draw from azimuth A − θ, so the runtime never rotates a point; it builds a new camera per group and re-runs the same shading. Order comes from separating planes: every pair of convex parts that can overlap gets a plane between them at build time, and each frame the sign of that plane against the view direction says which is in front, fed into a topological sort. The proof is an orbit audit that sweeps every angle in 0.3° steps for order and 0.05° steps for continuity. A full run on the turning dial took almost 23 minutes; references/3d.md puts it at 15 to 20 for 30 parts.
What it costs
The project site publishes Claude's active time for four figures, review rounds included and idle gaps left out, and I'd rather quote those than estimate:
| Figure | Active time | Notes |
|---|---|---|
| Watch movement | 1 h 54 min | one pass, checked by the same agent |
| Seasons (3D) | 1 h 57 min | 3D audit included |
| Raptor engine | 10 h 33 min | first working version in 38 minutes |
| Turbofan | 14 h | first build 4 h 41 min, then five review and fix rounds |
The pattern the author draws from it matches what the references say again and again: a first version that runs comes quickly, and most of the time goes into the second look at four times the size. For the big figures that second look is a team of agents: a builder, reviewers who each look through one lens and rebuild the page themselves, and a fixer, in rounds, each keeping a progress file. The turbofan's three review rounds left 309 screenshots.
So "describe a machine in one line" is true of the input. A Hero figure is an afternoon of an agent's time, and a figure like the turbofan is two days of review rounds.
Against the other drawing skills here
This site has read several skills that make Claude draw, and they sit on a line from "a prompt with taste" to "a kit with checks".
At one end, figures4papers is a house style for matplotlib written as a SKILL.md. When I audited it, its API reference named nine functions no file implemented, and nothing checked the rules it stated. The one-shot launch video skills are mostly instructions handed to an HTML video framework. Claude Motion is a hosted template where Claude writes code that plays as a video, with no checks you can see.
In the middle, Impeccable pairs 41 reference files of design advice with a Rust linter of 59 rules, which is where most of its value turned out to be: the measurement, tuned against real sites.
Anatomy is further toward the kit end than anything else I've read. Its rules are backed by code that makes them hard to break (you can't write a flipped face if you never write a face) and by checks whose output is a number. The closest thing on this site is our own explainer-film engine: the storyboard is data, the engine owns the look, and validate:films refuses a number the article doesn't contain. The difference is that our engine is ours. Anatomy ships its kit inside the skill, so every user's Claude gets the same 16,000 lines.
The other close relative is the hand-drawn canvas skill this site vendors for its article films: also a drawing library a model writes against, also judged from contact sheets. It has no equivalent of the audit, because a hand-drawn line is allowed to wobble. Anatomy's lines are not.
What I'd take, and what is thin
I'd take three things.
The first is the opening rule. "Draw the object, not the diagram" made the figure above better than the boxes-and-arrows version I would have drawn without it, and it costs one paragraph.
The second is constraining the model's output to a vocabulary the kit can check. Plans, heights and profiles in; shaded solids out. The audit and the line check are then possible because there is a small, typed record of what was drawn.
The third is the light-theme shader method: decide what the paper should show, then solve for the ink. Anyone drawing glow on a white page should read section 8 of references/webgl.md.
What is thin is mostly around the edges of the kit.
The verification is the product, and the user's agent has to run it. CI rebuilds every example and fails if a committed page changes by a byte, but it doesn't run the audit or the line check. The checks exist; whether your figure passes them depends on your Claude doing the work in step 10, and the skill's own Limits section says Claude is "not always good at seeing" its figures.
The React kit lags the rest. Two hook errors under React 19's lint, a useEased that sets state every frame against the skill's own rule, and no guard for server and client float drift. The SVG core is in much better shape than the React wrapper.
The docs are already drifting. The project site says six examples ship and SKILL.md is 155 lines; the repository has eight and 168. Small, but the repository is two days old.
The npm package is big. anatomy-figures 0.1.0, every collection figure as a React component, unpacks to about 21 MB across 332 files. Per-figure entry points mean a page pays only for what it imports, but check before you install it for one figure.
And the marketing undersells how candid the repository is. "Wireframes you can rotate" is the opposite of the craft rules, and "one line" hides hours. The repository says both plainly: its Limits section opens "It is slow on purpose".
How I checked
I cloned the repository at dbf697a with git clone --depth 1 and read SKILL.md, all eight references, kit/iso-kit.ts, kit/react/draw.tsx, kit/react/live.tsx, the head of kit/gl.mjs and kit/audit.mjs, the CI workflow, the contributing guide, the evals and the test-rig example. Line counts are wc -l on that clone. Repository age, stars, forks and commit count are from the GitHub API on 11 October; the npm package's size, file count and dates are from the npm registry. The post's numbers and the video are from the fxtwitter mirror of the thread; the three video frames are stills at 10, 20 and 26.5 seconds. The tokamak and roulette-wheel figures are my own renders of the project site's collection pages in headless Chromium, cropped to the figure; the Raptor, ripple tank and turning dial are the README's own images. Build times, the turbofan audit figures and the collection counts (52 figures: 22 SVG, 10 WebGL, 1 3D, 19 early examples) are from the project site and its "How I built it" page, and I could not check them.
I did not run any of the repository's code. The lint result comes from copying kit/react/live.tsx, kit/react/draw.tsx and kit/iso-kit.ts unchanged into this site and running its ESLint config on them, which reads the code without executing it. Fig 1 was built from my port of the kit and checked by server-rendering it with React, hydrating it in headless Chromium in both themes, at phone width, with reduced motion and with JavaScript off, and reading the screenshots.